Portland Leather Goods was built on craftsmanship and an appreciation for quality. Walking through the warehouse, you will meet artisans who are not only skilled, they are creatives who look at a box of scrap leather and see a box of possibility.
Finding ways to use the smaller pieces of scrap leather can result in something both beautiful and sustainable. When crafting an item such as a tote bag, large, geometric pieces are cut from the leather hide, leaving behind small, irregular pieces that aren’t quite big enough to become a pocket or a belt. Rather than throwing away these leftover scraps of leather and using additional energy and resources to create alternative materials, Portland Leather Goods encourages their artisans (and their customers) to find ways to use what is already available elsewhere in our lives.
Like fashion, home decor is a reflection of personal style and taste, so why limit a love of quality leather just to what you wear—especially when so much scrap leather is left over from making those larger fashion pieces. Leather is for more than just sturdy accessories and gorgeous totes, and is capable of adding an unexpected touch of luxury to a wide variety of items. It can even add rich texture and depth in the home. So, we’ve created a list of our eight favorite ways to incorporate small pieces of scrap leather into home decor.
Before getting started on your project, it is important to understand the different types of leather, and which is best to use for your project. We have two types of scrap leather available at Portland Leather Goods (as of 2020 we no longer offer scrap leather): chap leather and English bridle leather. Chap leather is thinner, more supple, and easier to work with. It’s what we use to create our signature tote bags. English bridle leather is a thicker leather typically used for belts and bag handles. For many of the projects below, you can use either, depending on your preference.
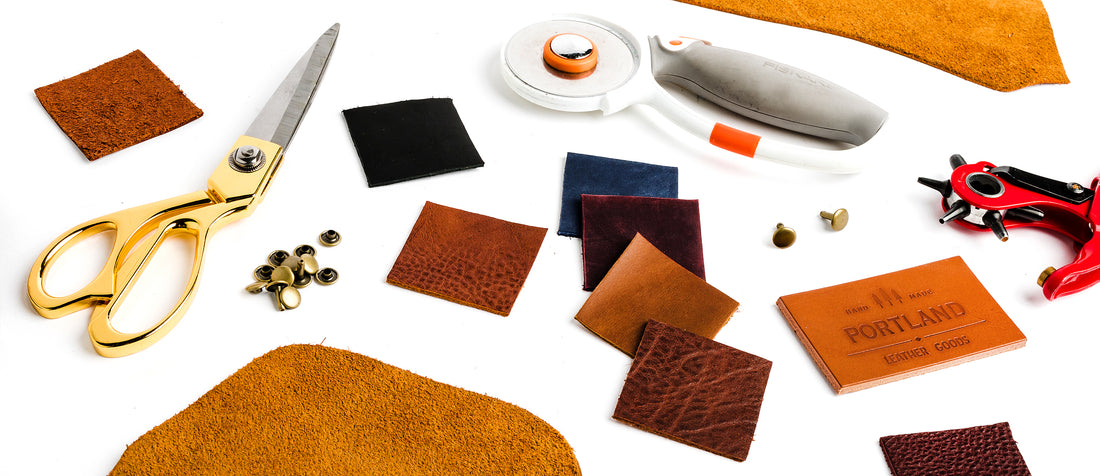
There are a few essential tools and materials for that any prepared DIY leather crafter should have on hand. To insure easy and beautiful leather crafting, you’ll want to have these items handy:
Revolving leather hole punch
X-acto knife (or very sharp crafting knife)
Screwdriver
Power drill
Hammer
Now that you have your leather scraps and the proper tools, you’re ready to create any (or all) of these eight scrap leather crafts for your home.
There’s no denying a tiny indoor herb garden is beautiful on its own, and adding a custom, leather herb planter label can add a layer of design to a simple pot.
Materials and tools:
- Scrap leather (English bridle leather works best, but any kind of scrap leather will do)
- Revolving leather hole punch
- Fine-point paint marker in white, gold, or silver
- Twine or string
- X-acto knife
Instructions:
- Cut out the tags into rectangles about 1”x 4” (or longer depending on the size of your pot) for your labels
- Punch holes on either end of the labels
- Use your paint pen to write the names of your herbs on each label and let dry
- Thread loops of twine through the holes and pull through to tie the labels on your herb pots, and you’re done!
- Drawer and cabinet pulls
These drawer pulls give both function and style to any thrift store dresser refurbishing project or kitchen cabinet update. The best part? This mixed-materials look is easy to create.
Materials and tools:
- Leather scraps (any type of leather will work just fine)
- 12” ruler
- X-acto knife
- Hammer
- Revolving leather hole punch
- Screws (make sure they fit the holes made by the original hardware)
- Screwdriver
Instructions:
- Remove the original hardware from the drawers or cabinet doors
- Measure the distance between the holes left behind, and cut strips of leather long enough so there will be overlap on either end, and so that you will be able to fit your hand in the handle once it’s installed
- Cut patterns on the ends or add any design elements you’d like, or leave the leather as-is for a more rustic look
- Punch holes in the leather. Make sure the distance measurements are the same for each strip to ensure a consistent look
- Thread the screws through the holes in the leather and screw your new pulls into place in your drawers or cabinets
- Picture frame
Leather can make a plain picture frame look unique and luxurious. Thrift stores are a great place to find inexpensive frames to give new life. Here’s how to create this look:
Materials:
- Leather scraps (any type of leather will do)
- Plain picture frame with flat frame surfaces
- Strong glue
- Leather cutting tool
- Clamp
Instructions:
- Take measurements of the outside edges and width of your picture frame
- Cut leather into strips the same length and width of each side, then cut the ends at 45 degree angles so the strips won’t overlap when they’re placed on the frame
- Glue strips to the frame, and clamp together while they dry
- Light switch plates
It’s the little touches that count, and your house guests will be sure to notice these leather light switch plates when passing through your home.
Materials and tools:
- Scrap leather
- X-acto knife
- Leather modular stylus (optional)
- Revolving leather hole punch
Instructions:
- Take your old light switch plate and trace the shape on the backside of your scrap leather, including the rectangular switch hole in the center and the place for screws on either end
- Cut along the tracing and remove the center switch hole
- Carve a design on the front of the leather using your modular stylus (optional)
- Punch the holes for the screws
- Screw into place over your light switch, and flip on the light!
- Coasters
These leather coasters are simple, yet cool. You can mix and match colors or create a matching set, depending on which colors of scrap leather you have on hand.
Materials and tools:
- English bridal scrap leather
- X-acto knife
- Thread and leather needle (optional)
- Paint (optional)
Instructions:
- Make a stencil in the shape of your choice (you can’t go wrong with squares and circles)
- Following the stencils, cut out the coasters
- You can either leave coasters nice and simple, or spice them up with leather stamps, stitching around the edges, or decorating with a touch of paint
- Bar and drink tags
These little leather beauties are sure to please your next cocktail party guests.
Materials and tools:
- Scrap leather
- Brass eyelets and a setter
- Revolving hole punch
- X-acto knife
- Mallet or hammer
- Twine or string
- Leather stamp set
Instructions:
- Cut out the tags in whatever shape you’d like (make sure they’re large enough to fit your letters)
- Wet the front of your tag with a damp cloth or sponge
- Place your tag on a safe, flat surface and stamp the leather by hitting it a few times with your mallet.
- Punch a hole at the top of the tag using the rotary punch.
- Insert an eyelet in the hole with the setter, and thread it with your string.
- Decorate your bar by tying these tags around bottle necks or glass handles.
- Tray with leather handles
Dress up your coffee table by adding a homemade tray with leather straps. A perfect place to set your candles or small succulents.
Materials and tools:
- Scrap leather (chap or English Bridal)
- Scrap lumber
- Sand paper
- Wood stain and paint brush or stain cloth
- Sewing machine and thread (optional)
- Drill
- Bronze screws
Instructions:
- Sand down the wood until smooth
- Stain the wood whatever color you’d like and let dry
- Trim the scrap leather into straps. Keep in mind that you want these to lie mostly flat on the board, but need to be raised enough to grab ahold of.
- Optional: Put two straps together (wrong sides facing each other) and use a sewing machine to add stitches around the edges. Or, you can skip this step and use single-layered handles for a more rustic look.
- Make sure the straps are placed evenly on either side of the board and attach with screws
- Napkin rings
These incredibly easy-to-craft leather napkin rings add a rustic touch to any dinner setting.
Materials and tools:
- English bridal scrap leather
- X-acto knife
Instructions:
- Cut the scrap leather into .5”x6” strips
- Roll up a cloth napkin, and tie the strips of leather around the napkins and display with the tie on top
We’d love to see how you repurpose scrap leather. Share your DIY scrap leather projects with us on Instagram by tagging @portlandleather or using the hashtag #portlandleather. Happy leather crafting!